Minecraft, a game brimming with creativity and exploration, offers a vast array of potions to enhance a player’s abilities. One such potion, the Night Vision Potion, allows players to pierce the veil of darkness and navigate the murky depths with ease.
This article delves into the process of brewing a Night Vision Potion, exploring the required ingredients, brewing stand mechanics, and the beneficial effects this potion grants players venturing into the darkness.
The Benefits of Night Vision: Seeing Clearly in the Dark
The Night Vision Potion offers a significant advantage in Minecraft, especially during nighttime or when venturing into poorly lit areas like caves, mineshafts, or underwater environments. Here’s how it benefits players:
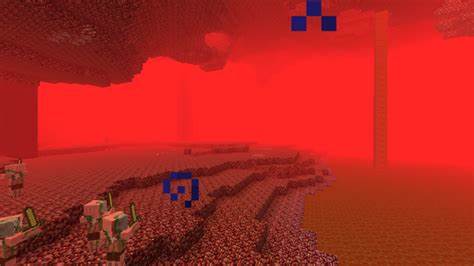
Enhanced Visibility: The potion removes the darkness fog, allowing players to see their surroundings clearly, even in dimly lit areas. This improves their ability to navigate, identify potential dangers, and gather resources.
Strategic Advantage: Night vision can give players a tactical edge, especially in PvP scenarios. They can spot hidden enemies lurking in the shadows, allowing for a more strategic approach to combat.
Exploration Efficiency: With improved visibility, players can explore caves, mineshafts, and other dark environments more efficiently. They can locate resources, identify hidden pathways, and avoid dangers with greater ease.
Gathering the Ingredients: A Brewing Recipe for Night Vision
To brew a Night Vision Potion, you’ll need to gather two key ingredients:
Nether Wart: This essential ingredient is found growing in Nether Fortresses, ominous structures located in the Nether dimension. Nether wart can be obtained by breaking the wart block with any tool.
Carrot: This readily available ingredient can be found growing in villages or cultivated by planting carrot seeds on farmland. Carrots can be harvested using any tool.
The Brewing Stand: Your Gateway to Potions
Once you have your ingredients, you’ll need a Brewing Stand to craft your Night Vision Potion. Here’s a breakdown of the Brewing Stand and its functionalities:
Crafting the Brewing Stand: Combine three cobblestones in a T-shape on your crafting grid, with a Blaze Rod placed in the top center slot.
Fueling the Brewing Stand: Blaze Powder is the primary fuel source for the Brewing Stand. Each Blaze Powder provides enough fuel to brew one potion.
Positioning the Ingredients: Place the Nether Wart in the bottom slot of the Brewing Stand and the carrot in a brewing potion bottle placed in one of the top three slots.
The Brewing Process: Transforming Ingredients into Potions
With your ingredients and Brewing Stand prepared, here’s a step-by-step guide to brewing a Night Vision Potion:
Fire Up the Brew: Add Blaze Powder to the fuel slot of the Brewing Stand. The flames will indicate that the brewing process has begun.
The Awkward Potion Stage: After a short while, the potion in the bottle will turn brown, signifying the creation of an “Awkward Potion.” This is the base potion used for further crafting.
Adding the Carrot: Once the Awkward Potion stage is complete, add the carrot to the potion bottle in the top slot. The potion will begin to simmer again.
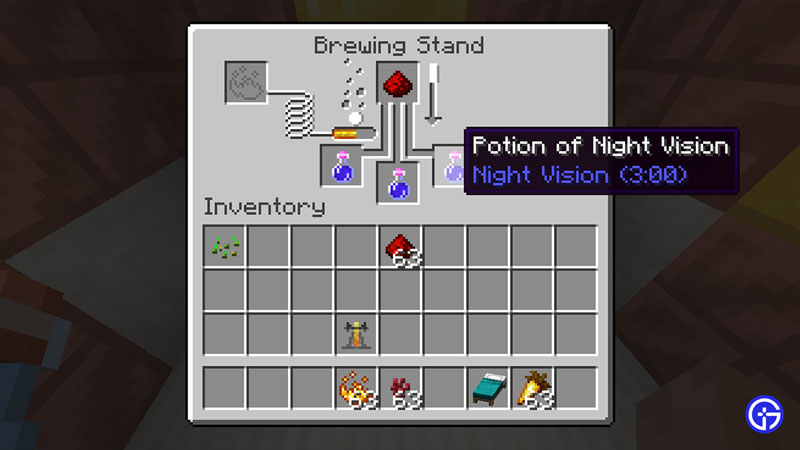
The Night Vision Potion: After another brewing cycle, the potion will turn bright orange, indicating a successful Night Vision Potion!
The Effects of the Night Vision Potion: How Long Does It Last?
Once you’ve brewed your Night Vision Potion, it’s time to unleash its power! Here’s a breakdown of the effects and duration:
Effect: Upon consuming the potion, a shimmering night vision effect will be applied to the player’s vision, allowing them to see clearly in the dark for a set duration.
Duration: The default duration of a Night Vision Potion is three minutes. However, this duration can be extended by adding Redstone Dust during the brewing process. Each Redstone Dust extends the effect by an additional eight minutes.
Beyond the Basics: Brewing Stronger Potions
There are additional ways to enhance your Night Vision Potions:
Redstone Dust: As mentioned earlier, adding Redstone Dust during the brewing process extends the duration of the potion’s effect.
Glowing Redstone Dust: A rarer ingredient, Glowing Redstone Dust, can be used to create a Splash Potion of Night Vision. This allows players to throw the potion, applying the night vision effect to themselves and nearby players.
FAQs
What are the benefits of using a Night Vision Potion in Minecraft?
Night Vision Potions offer several advantages:
Enhanced Visibility: The potion removes the darkness fog, allowing you to see clearly even in dimly lit areas. This improves navigation, resource gathering, and danger identification.
Strategic Advantage: Night vision grants a tactical edge, especially in PvP. You can spot hidden enemies, allowing for a more strategic approach to combat.
Exploration Efficiency: With improved visibility, exploring caves, mineshafts, and other dark environments becomes more efficient. You can locate resources, identify hidden pathways, and avoid dangers with greater ease.
What ingredients do I need to brew a Night Vision Potion?
You’ll need two key ingredients:
Nether Wart: This essential ingredient grows in Nether Fortresses, ominous structures located in the Nether dimension. Break the wart block with any tool to obtain it.
Carrot: A readily available ingredient found growing in villages or by planting carrot seeds on farmland. Harvest carrots using any tool.
How do I create a Brewing Stand?
To brew potions, you’ll need a Brewing Stand. Here’s how to craft it:
Crafting Grid Setup: Arrange three cobblestones in a T-shape on your crafting grid.
Blaze Rod Placement: Place a Blaze Rod in the top center slot of the crafting grid.
How do I brew a Night Vision Potion?
Here’s a step-by-step guide to brewing your potion:
Fire Up the Brew: Add Blaze Powder to the fuel slot of the Brewing Stand. Flames indicate the brewing process has begun.
Awkward Potion Stage: After a while, the potion will turn brown, signifying the creation of an “Awkward Potion,” the base for further crafting.
Adding the Carrot: Once the Awkward Potion stage is complete, add the carrot to the potion bottle in the top slot. The potion will simmer again.
The Night Vision Potion: After another brewing cycle, the potion will turn bright orange, indicating a successful Night Vision Potion!
To read more, Click here