
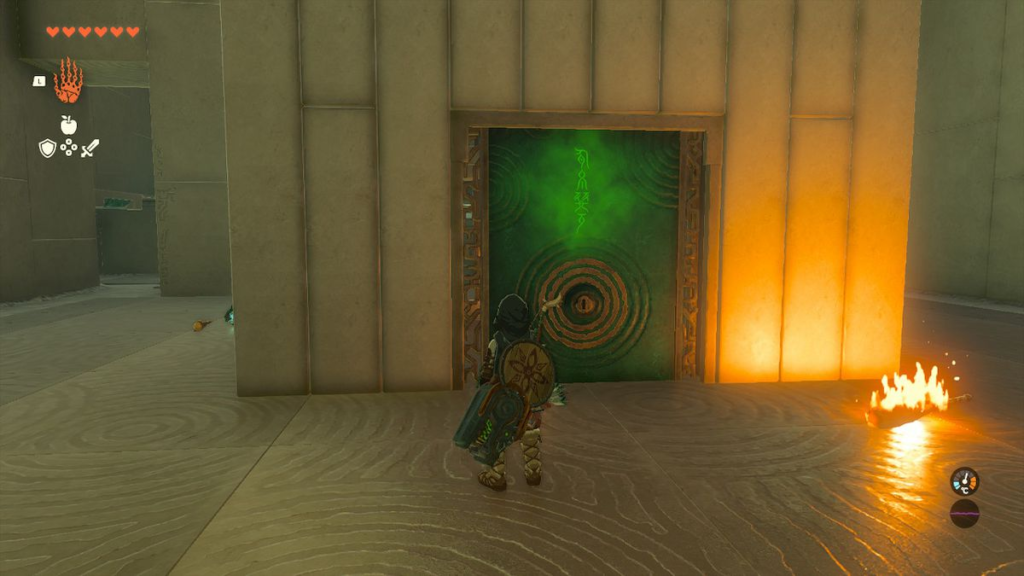
The frigid peaks of the Hebra Mountains hold many secrets in the land of Hyrule. Among them lies the Orochium Shrine, a hidden challenge in the latest instalment of the Legend of Zelda series, Tears of the Kingdom. This shrine tests Link’s courage, ingenuity, and mastery of his Sheikah Slate abilities. Whether you’re a seasoned Zelda veteran or a newcomer to the series, this guide will equip you with the knowledge to navigate the Orochium Shrine’s twists, turns, and puzzles.
Locating the Shrine: A Breathtaking Climb
The Orochium Shrine sits nestled amidst the snow-capped peaks north of Snowfield Stable. Its exact coordinates for those with a keen eye for exploration are -1638, 2643, and 0239. Reaching the shrine itself requires a bit of a climb. Utilize the updrafts created by your paraglider to navigate the treacherous slopes, or for a more daring approach, try carving a path through the deep snow with your trusty Sheikah Slate. The biting cold won’t be a bother inside the shrine, but warm clothes might be helpful for your trek!
Unveiling the Trials: A Puzzle for Every Hero
Once inside the Orochium Shrine, Link is greeted with a series of interconnected chambers, each presenting a unique challenge. Here’s a detailed breakdown of the puzzles you’ll encounter:
1. Maneuvering Through the Cold Embrace:
The first chamber introduces you to a series of rotating platforms and moving ice blocks. Use the Sheikah Slate’s Stasis Rune to freeze the platforms in mid-air, allowing you to safely navigate across. Be mindful of the strategically placed enemies – a well-timed flurry rush or a strategic use of bombs can help clear your path.
2. A Trial of Stealth and Hidden Depths:
The next chamber requires a touch of stealth. A Bokoblin patrols the area, guarding a hidden chest containing valuable loot. Use the environment to your advantage – crouch behind cover and utilize Sheikah Slate’s ability to create diversions to get the upper hand. Don’t forget to explore the hidden alcove behind the Bokoblin for the secret chest containing a valuable weapon or armor piece.
3. A Leap of Faith and a Shifty Passage:
The third chamber presents a seemingly impassable gap guarded by a laser grid. Don’t be discouraged! The solution lies in a hidden passage directly above the laser grid. Look for a small opening you can squeeze through by crouching. This passage leads to a platform overlooking the laser grid. Use magnesis to pull open a metal gate, revealing a hidden elevator platform. Take the elevator up to the next level.
4. Facing the Guardians and Claiming the Orb:
The upper level presents another challenge – two Guardian Scouts patrol the area. These nimble enemies pack a punch, so strategic use of bombs, arrows, or well-timed perfect dodges are key to defeating them. Once eliminated, a small green orb becomes accessible. This orb serves as the key to unlocking the final challenge.
5. The Ascendancy and the Path to Victory:
Carrying the green orb, navigate back down the elevator and through the hidden passage. On the lower level, locate a small green platform acting as an elevator on the left path from the main stairs. Place the orb in the designated hole at the top of the next set of stairs. This activates the final challenge area.
6. A Farewell to Fear: The Final Chamber and the Shrine’s Reward
The final chamber is a vast open space with a central platform holding a special Sheikah Slate power – the “Paraglider Plus.” However, to claim it, you’ll need to overcome a final obstacle course. The path is riddled with laser beams and moving platforms. Here, a combination of precise movement, strategic use of Stasis, and a touch of courage is required. Don’t be afraid to fall – use the Paraglider Plus you’re aiming to claim to soften your landings and reach the platform.
Once you reach the central platform, a Monk awaits, ready to test your skills one last time. Defeating the Monk grants you access to the Paraglider Plus, a permanent upgrade that allows you to stay aloft for extended periods. This newfound ability opens up new exploration possibilities in the vast world of Hyrule.
FAQs
Q. What is the Orochium Shrine?
The Orochium Shrine is one of 152 shrines found in the game The Legend of Zelda: Tears of the Kingdom. It’s a location filled with puzzles that test your problem-solving skills and mastery of Link’s abilities. Completing the shrine rewards you with a valuable prize.
Q. Where is the Orochium Shrine located?
You’ll find the Orochium Shrine in the Hebra Mountains region, north of Snowfield Stable. The exact coordinates are -1641, 2645, and 0239.
Q. What does “Orochium” mean?
The exact meaning of “Orochium” in the context of the game is unknown. However, it might be derived from a combination of words: “Orochi” which is a Japanese dragon serpent in mythology, and “Chthonius” a Greek word referring to the underworld.
Q. How to solve the Orochium Shrine puzzles?
The Orochium Shrine features multiple challenges that require using various abilities. Finding a comprehensive guide online will be most helpful, but here’s a teaser: be prepared to navigate twisting corridors, defeat enemies strategically, and utilize tools like the paraglider and the Magnus Reeso (remote bomb) to solve environmental puzzles.
Here are some helpful resources for a full walkthrough:
- IGN’s Orochium Shrine Guide: https://www.ign.com/videos/the-legend-of-zelda-tears-of-the-kingdom-orochium-shrine-gameplay-walkthrough
- YouTube Video Walkthrough: [YouTube Orochium Shrine walkthrough Tears of the Kingdom]
Q. Is there a secret chest in the Orochium Shrine?
Yes! Be sure to explore the initial area thoroughly. You’ll find a hidden passage after defeating an enemy near the stairs.
Q. What gear should I bring to the Orochium Shrine?
The climate in the Hebra Mountains is cold, so equipping warm clothing is recommended. Beyond that, bring the standard adventuring gear: weapons, a bow and arrows, and your trusty Sheikah Slate.
Q. Can I revisit the Orochium Shrine after completing it?
Yes, you can revisit any shrine you’ve already completed as many times as you like. This can help practice your puzzle-solving skills or collect any missed items.
By conquering the Orochium Shrine, you’ll not only add another valuable reward to your collection but also hone your skills as hero Link!
To read more, Click here