Hogwarts Legacy is brimming with secrets waiting to be uncovered. One such enticing prospect is the Cursed Tomb Treasure side quest, offering a cryptic map and a chance to plunder hidden riches. But where do you begin, and what challenges lie in wait? This comprehensive guide will equip you with all the knowledge you need to navigate the treacherous tomb and claim your prize.
Initiating the Treasure Hunt: Finding the Mysterious Map Fragment
The key to embarking on this adventure lies within the Helm of Urtkot main quest. As you progress through this storyline, you’ll gain possession of a crucial item – the Mysterious Map Fragment. This tattered piece of parchment holds the key to the treasure’s location and the puzzle guarding it.
However, the map fragment itself remains a mystery. It depicts a crudely drawn location and a cryptic symbol resembling the “Flippendo” spell. Deciphering this map and utilizing the hinted spell will be paramount in securing the treasure.
Here’s a helpful tip: Before setting off, ensure you’ve mastered the Alohomora spell. You’ll encounter a locked chest along the way, and unlocking it is essential to progress.
Locating the Tomb: A Journey to the Tomb of Treachery
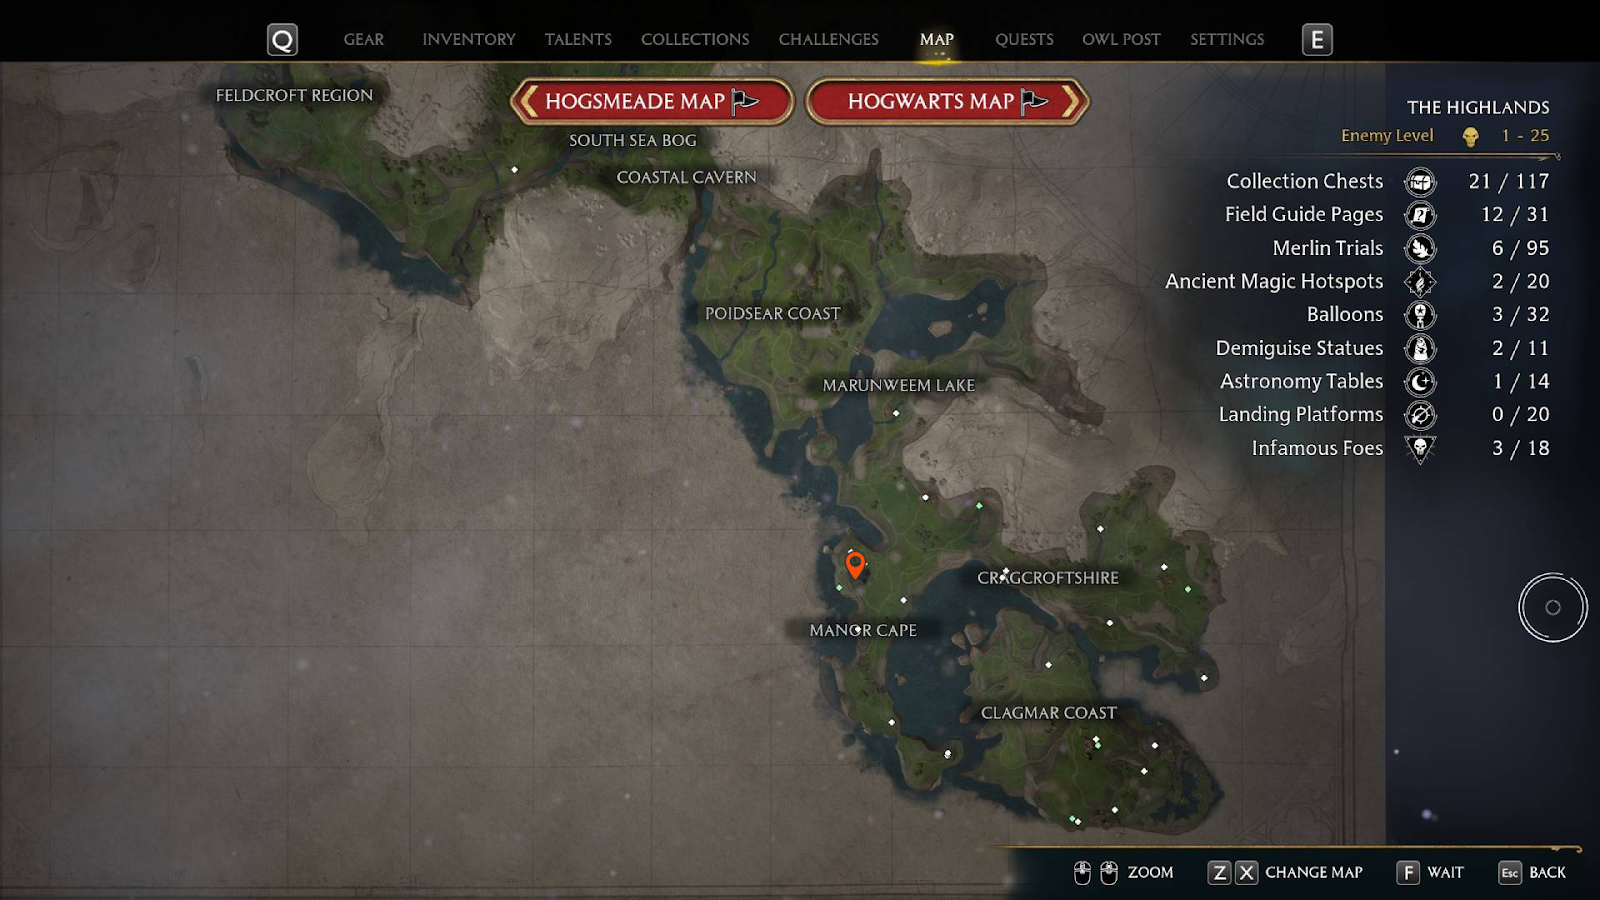
The map fragment points towards the Tomb of Treachery, situated on the northwest corner of the Poidsear Coast region. Fast travel to the West Manor Cape Floo Flame for a convenient starting point.
Once there, you’ll find a majestic waterfall cascading down the cliffs. Look behind the waterfall – a hidden entrance awaits, leading into the depths of the tomb. Be prepared, for the tomb’s depths are not for the faint of heart.
Navigating the Perils: Unveiling the Tomb’s Secrets
As you delve into the tomb, equip yourself with light-emitting spells like Lumos. The path ahead will be shrouded in darkness, and illumination will be crucial.
Your first obstacle will be a series of web-covered doorways. Cast Lumos to reveal three moths flitting about the chamber. These ethereal creatures hold the key to unlocking the doorways.
Here’s where things get interesting: You’ll need to strategically guide the moths towards the doorways using Lumos. The first two moths reside within this initial chamber, with one potentially trapped behind a spiderweb. Use your combat spells to clear the obstruction and free the trapped moth.
The final moth presents a slight challenge. It resides on a higher platform, inaccessible without some magical assistance. Locate a nearby box and employ the Wingardium Leviosa or Leviosa spell to elevate it, creating a makeshift stepping stool. Ascend the makeshift platform and gently guide the last moth to the final doorway using Lumos.
With all three moths illuminating the doorways, they will magically unlock, granting you passage deeper into the tomb.
Beware: As you venture further, prepare to face hostile creatures like spiders. Cast your offensive spells strategically to eliminate these pesky inhabitants.
The Cryptic Puzzle: A Test of Wit and Magic
After battling your way through the caverns, you’ll arrive at a crucial chamber. Here, the true test of your wit and magical prowess begins.
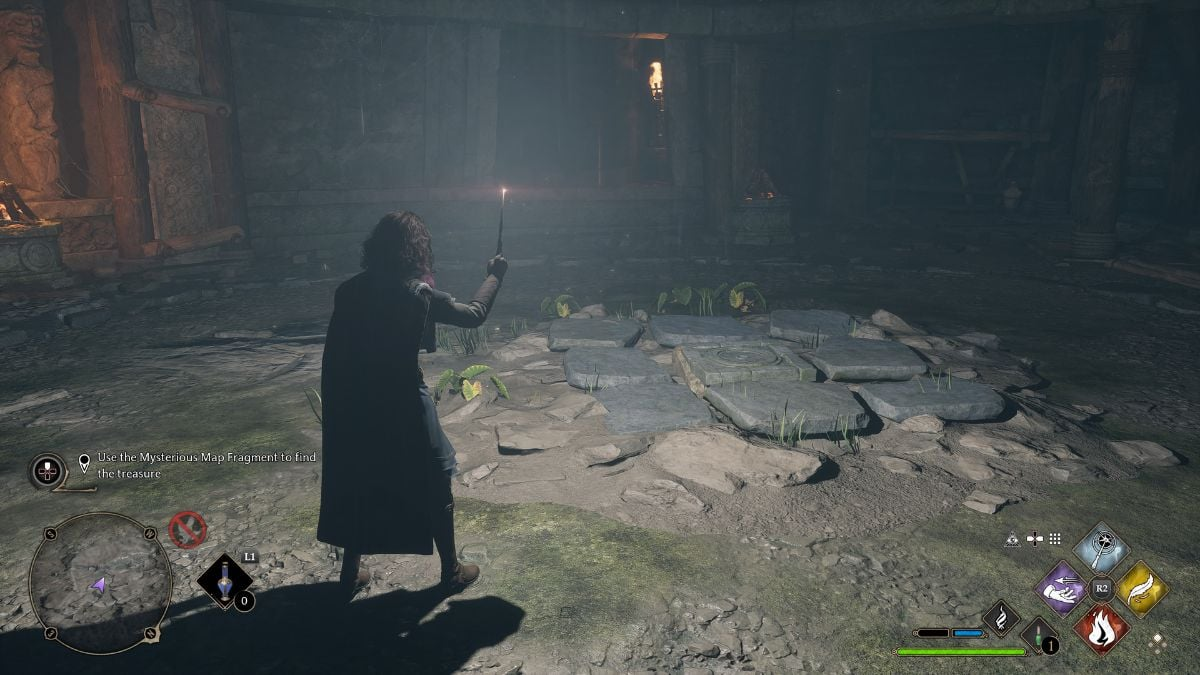
The chamber will house a peculiar arrangement of stone blocks, some bearing arrows etched upon their surface. Refer back to the Mysterious Map Fragment – the symbol resembling “Flippendo” holds the key.
Carefully examine the map fragment and the stone blocks. You’ll need to use the “Flippendo” spell to rotate specific blocks, ensuring their engraved arrows align with the directions indicated on the map fragment.
Pro Tip: Pay close attention to your character’s positioning within the chamber. The perspective from which you view the stone blocks will determine the correct direction for the arrows.
Patience is key: Solving this puzzle requires methodical experimentation.Keep flipping the blocks until the configuration aligns perfectly with the map fragment.
Claiming Your Reward: The Treasure Awaits
Once you’ve successfully solved the puzzle using “Flippendo” and aligned the stone blocks, a hidden platform will rise from the chamber floor. Ascend this platform, and you’ll be greeted by a gleaming chest – the culmination of your treasure hunt.
Open the chest with anticipation, and you’ll be rewarded with the “Seeker’s Attire.” This unique outfit offers valuable enhancements for your character, potentially boosting your exploration and resource gathering abilities.
FAQ’S
How do I start the Cursed Tomb Treasure quest?
The Cursed Tomb Treasure quest doesn’t have a specific NPC quest giver. You’ll stumble upon it by finding a Mysterious Map Fragment in a locked chest. To access these locked chests, you’ll need to learn the Alohomora spell. The map fragment itself is found during the “Helm of Urtkot” main story quest in the Manor Cape region.
Where do I find the Cursed Tomb Treasure?
The treasure’s location is marked on the Mysterious Map Fragment. It points to the Tomb of Treachery dungeon, situated on the northwest corner of the Poidsear Coast region. Look for the Floo Flame marker called “Tomb of Treachery” to fast travel directly there.
I reached the Tomb of Treachery, but how do I get in?
The entrance to the Tomb of Treachery is hidden behind a waterfall. Fly through the waterfall and past the standing stones to reveal the “Tomb of Treachery” Floo Flame.
What awaits me inside the Tomb of Treachery?
The tomb is a dungeon filled with challenges. You’ll encounter enemies like Inferni and spiders. You’ll also need to solve puzzles using spells like Lumos to guide moths to unlock doors, Wingardium Leviosa to move crates, and Incendio to burn cobwebs.
Is there a specific level requirement for this quest?
There’s no official level requirement, but since the quest involves combat and puzzles, it’s recommended to be at a comfortable level for the Poidsear Coast region.
What’s the reward for completing the Cursed Tomb Treasure quest?
The treasure itself is a piece of clothing called “Seeker’s Attire.” This clothing item might have specific visual customization options or offer minor gameplay benefits.
Can I miss out on the Cursed Tomb Treasure quest?
No, the Mysterious Map Fragment can be found throughout the game, so you won’t miss out on the quest permanently. However, you’ll need to progress through the story until you unlock the Alohomora spell to access the chest containing the map fragment.
I found the mausoleum with the reaper statue, but nothing happens. What am I missing?
Make sure you’re at the correct location – the mausoleum with the reaper statue is near the West Manor Cape Floo Flame, southwest of the abandoned manor in the Manor Cape region. Light the torch at the base of the statue with a fire spell (like Incendio) to reveal the secret entrance leading to the basement where the quest truly begins.
Is there a way to cheese the puzzles in the Tomb of Treachery?
The puzzles are straightforward and shouldn’t require complicated solutions. Focus on using the right spells for the obstacles – Lumos for moths, Wingardium Leviosa for crates, and fire spells for cobwebs.
I completed the dungeon but can’t find the treasure chest!
The treasure chest is located at the very end of the Tomb of Treachery. Make your way through the entire dungeon, solving puzzles and defeating enemies, and you’ll eventually reach the chest containing the Seeker’s Attire.
To read more, Click here